How to make a better Tactile Sensor for your Robot:
--- Just click the image to enlarge! ---
First of all, I came up with this design because sometimes, I can't dab a solder on the spring well, eventhough the spring is solderable (is my term right?). And also, when the tactile wire was soldered on the spring, it looks kinda messy or something like that. I want to make it more professional when making sensors like this one. So, here it is...a simple, effective, omni-directional and a much better design. Here we go.........
1. The materials...
![]()
2. Insert the heat-shrink tubings on the 2 solid wires and heat it as shown below. The 2 rods (with heat-shrink tubings) should be well-fitted inside the spring.
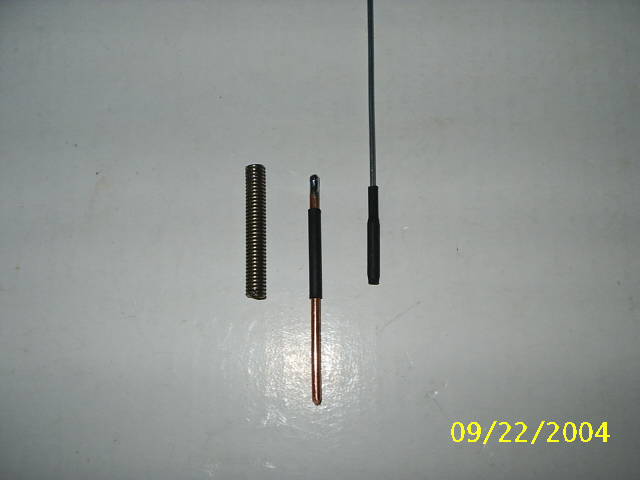
........remember to leave a space on the solid copper wire (this will be the contact point).
3. Make sure it's well-aligned and double-check everything you've made.
![]()
4. Now, put a glue (quick drying glue) on the 2 rods (around the surface of the heat-shrink tubing) to be inserted in the spring. This way, the rods will not rotate or move.
![]()
![]()
![]()
5. Let the glue dries up. Then...presto! You have a neat tactile sensor for your robot. No need to solder whatsoever, just a dab of quick drying glue and some heat-shrink tubing...and you're done!
![]()
![]()
6. Testing...
![]()
![]()
Here's a sample drawing to see the contacts inside the spring:
![]()
Some tips:
You can also solder the tip of the "contact" rod that's inside the spring. This will make a better contact with the spring when it's bent (just like what I did in #2 image).
You can adjust it's sensitivity by moving the contact rod (or the tactile rod) back or forth. Do this by using a tester or any indicators to see it's sensitivity.
Keep experimenting and use your wild imagination!
Goodluck and keep BEAMing!!!
Visitors
since Sept. 23, 2004
Free Hit Counter